


This is a step by step guide on using Opencv for osrs botting in python and is great for beginnners to start using python for object detection. OpenCV is an open source computer vision library with hundreds of functions for processing and understanding images.
OpenCV documentation: https://docs.opencv.org/4.8.0/
Initial Setup for opencv
The fastest way to start with osrs botting involves a simple command into the terminal of pycharm:
pip install opencv-python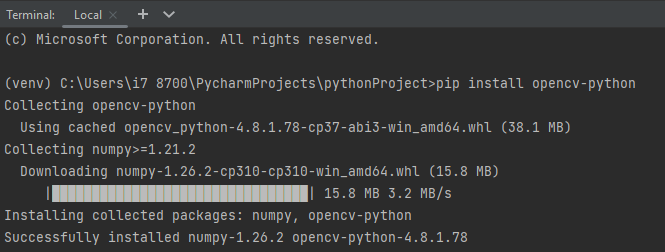
Note: Don’t know how to install pycharm or what a terminal what these pip installs are? Use this guide click here
Once installed, osrs bot can leverage the library by importing cv2. When working with OpenCV data, Numpy plays a crucial role, so the beginning of osrs botting Python files will resemble this:
import cv2
import numpy as np
That’s the complete setup. Now, let’s acquire an image for processing. I’ll use a screenshot from Runescape as an example, but any screenshot can work for any game or program (works well for static icons).
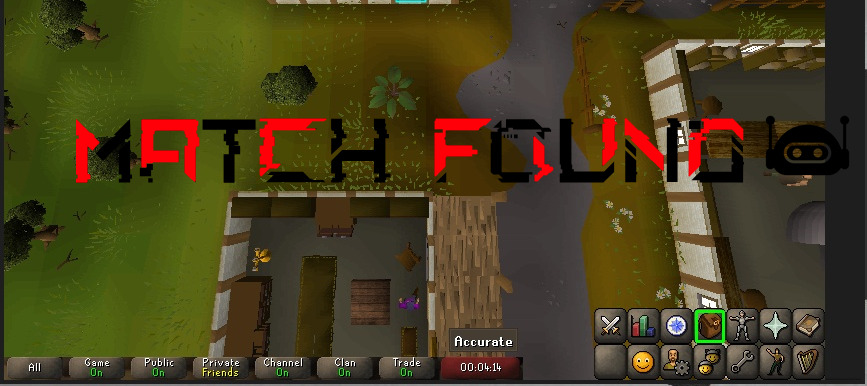
needle and Haystack Images: osrs botting object detection
Lets find this image:

In this screenshot:
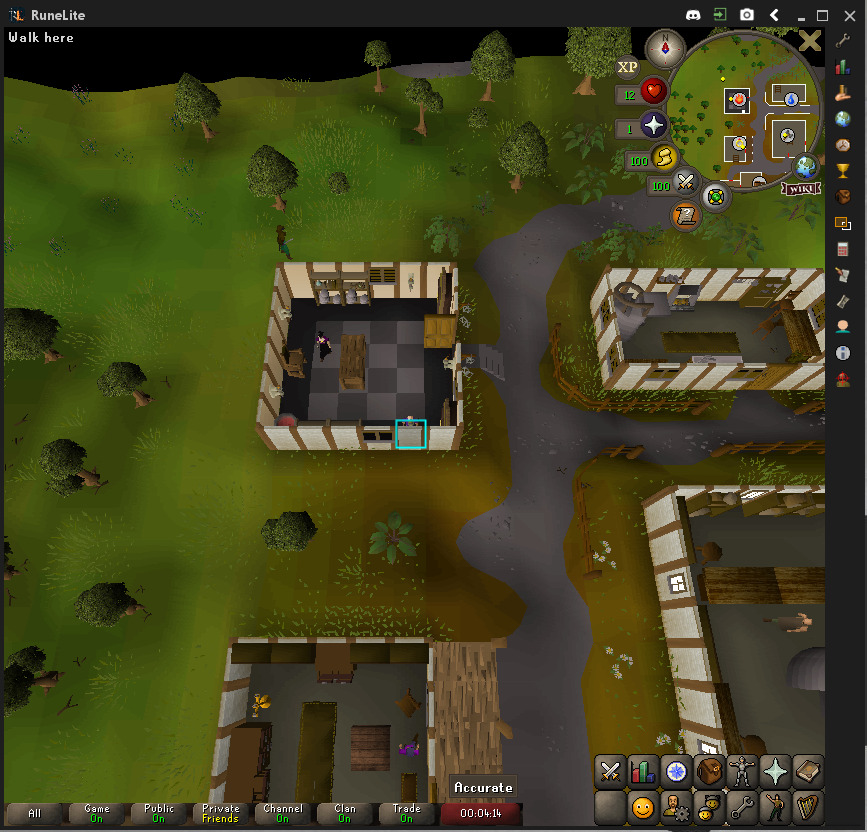
This is the base for our osrs botting code. Our task involves extracting a small segment from the screenshot, saving it as a separate image file, and then utilizing OpenCV to locate this smaller image within the entire screenshot. For instance, I’ll extract one of the cabbages from my screenshot.
The primary OpenCV function we’ll concentrate on is called matchTemplate(). By referring to the documentation, we learn that this function requires an image to scan over, an image to search for, and a comparison method. The outcome will be a result array. To determine the optimal comparison methods for osrs botting specific case, experimentation is key.
Start Coding opencv osrs botting script
Now, let’s delve into coding. Our initial step is to load our image files.
Load the Images with opencv
# Load the images
haystack_img = cv2.imread('path_to_haystack_image')
needle_img = cv2.imread('path_to_needle_image')
Need more info on what cv2.imread does? read Mastering Image Loading with OpenCV’s imread Function: A Comprehensive Guide
The image termed as the “haystack” represents our screenshot, and our objective is to scan this image for the “needle” image that we’ve extracted. Within the imread() function, the initial parameter specifies the path to the image file, while the second parameter serves as a flag allowing pre-processing during image loading. For our current task, we’re loading these images without any alterations.
Having successfully loaded our images, the subsequent step involves invoking matchTemplate().
Use template matching for osrs botting
# Perform template matching
result = cv2.matchTemplate(haystack_img, needle_img, cv2.TM_CCOEFF_NORMED)
To visualize the outcomes produced by matchTemplate(), we can utilize imshow() to display this data.
Display the results in opencv
Next is displaying the image using opencv imshow.
The imshow() function in OpenCV is used to display images or visualizations created using OpenCV functions. It opens a window to showcase the specified image or canvas.
Here’s why osrs botting will use imshow() in OpenCV:
- Visualization: When working with computer vision tasks or image processing using OpenCV, it’s essential to visualize the results.
imshow()helps display the processed images, allowing you to see the effects of various operations like edge detection, filtering, object detection, etc. - Debugging and Validation: It aids in debugging your code by providing a visual representation of the intermediate or final results. You can validate whether your algorithms are functioning as expected by visually inspecting the images.
- User Interaction: When building applications involving computer vision, displaying images using
imshow()can be crucial for user interaction. It allows users to see the processed images, enabling them to make decisions or interact with the application based on the displayed output.
For more info on what imshow does check out: Opencv imshow: Mastering Image Visualization – Comprehensive Guide
# Display the results
cv2.imshow('Result', result)
cv2.waitKey(0)
cv2.destroyAllWindows()
The result I get looks like this:
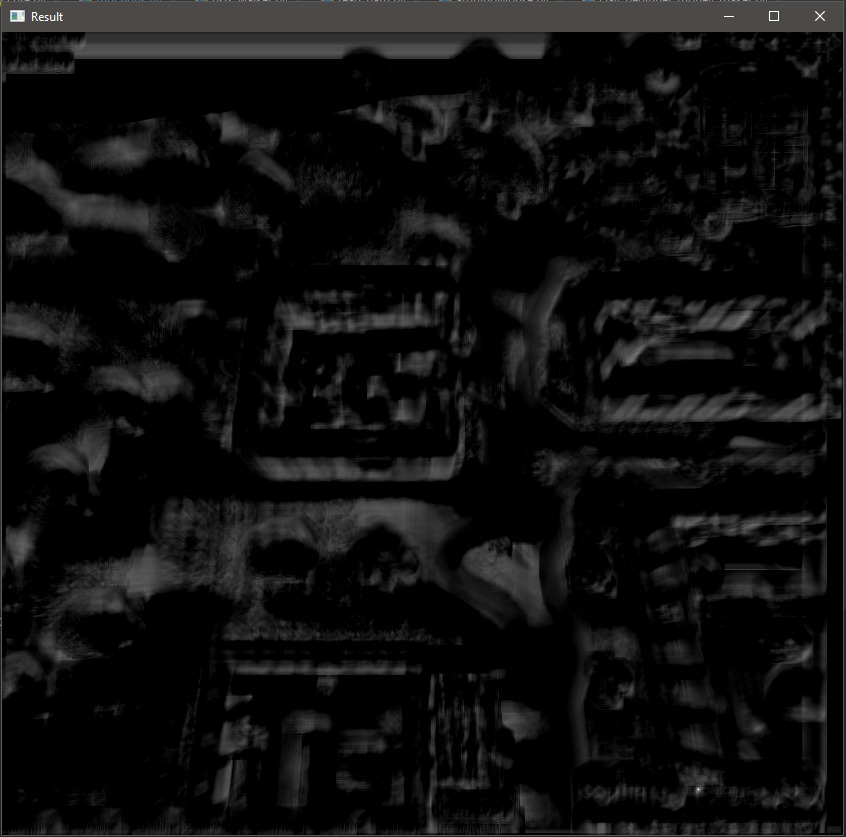
Within the resultant image, the vivid white pixels signify the locations most closely aligned with the cropped image being identified. In addition, the black pixels indicate the least compatible matches. It’s worth noting that these optimal match positions precisely align with the upper left corner, corresponding to where the needle image would be situated.
The above example has a white hotspot in the lower right hand side of the image which suggests the osrs bot has found a match!
Having effectively visualized the outcomes generated by matchTemplate(), the subsequent step involves extracting the precise coordinates of these ideal matches. This task can be accomplished by employing the minMaxLoc() function.
Get best match location
# Get best match location
min_val, max_val, min_loc, max_loc = cv2.minMaxLoc(result)
The minMaxLoc() function provides us with four values. Initially, it furnishes confidence values representing the best and worst matches on a scale from 0 to 1. These values indicate the darkness or brightness of the pixels in our result image, ranging from perfect black (0) to perfect white (1). Additionally, minMaxLoc() returns the positions of these best and worst match pixels in the form of an (X,Y) tuple.
When we apply matchTemplate() with a needle image, minMaxLoc() invariably delivers values, even if the cropped image isn’t found within the haystack. A low maximum confidence value indicates an inadequate match. The threshold for what constitutes “too low” relies on the nature of the images being processed and the intended goals of the analysis.
Determining if a match is sufficiently good or not depends on setting a threshold for the maximum confidence value.
Upon identifying a favorable match, our next step involves marking its location within the haystack image. This task is achieved using OpenCV’s rectangle() function.
Draw a rectangle around the matched region
In OpenCV, drawing a rectangle is a straightforward process using the rectangle() function. This function allows the osrs bot to draw a rectangle on an image or a canvas with specified parameters such as the starting point, width, height, color, and thickness.
cv2.rectangle()draws a rectangle on the specified canvas/image.haystack_imgis a NumPy array representing the image where the rectangle will be drawn.- max_loc and
locationare tuples defining the top-left and bottom-right coordinates of the rectangle respectively. - (0, 255, 0 )
colorrepresents the green color of the rectangle in BGR format. thicknessspecifies the thickness of the rectangle border.
This example creates a black canvas and draws a green rectangle on it from (100, 100) to (300, 300) with a thickness of 2 pixels.
Remember, OpenCV uses the BGR color format, so colors are represented as tuples in the order (blue, green, red)
# Draw a rectangle around the matched region
threshold = 0.9  # Adjust this value based on your use case
if max_val >= threshold:
    # Get dimensions of needle image
    needle_h, needle_w = needle_img.shape[:2]

    # Calculate bottom right of the rectangle
    location = (max_loc[0] + needle_w, max_loc[1] + needle_h)

    # Draw the rectangle
    cv2.rectangle(haystack_img, max_loc, location, (0, 255, 0), 2)
osrs botting Output detection result
The final step is to write the final result to an image with the desired needle image marked.
# Output the final result
cv2.imwrite('output_image.jpg', haystack_img)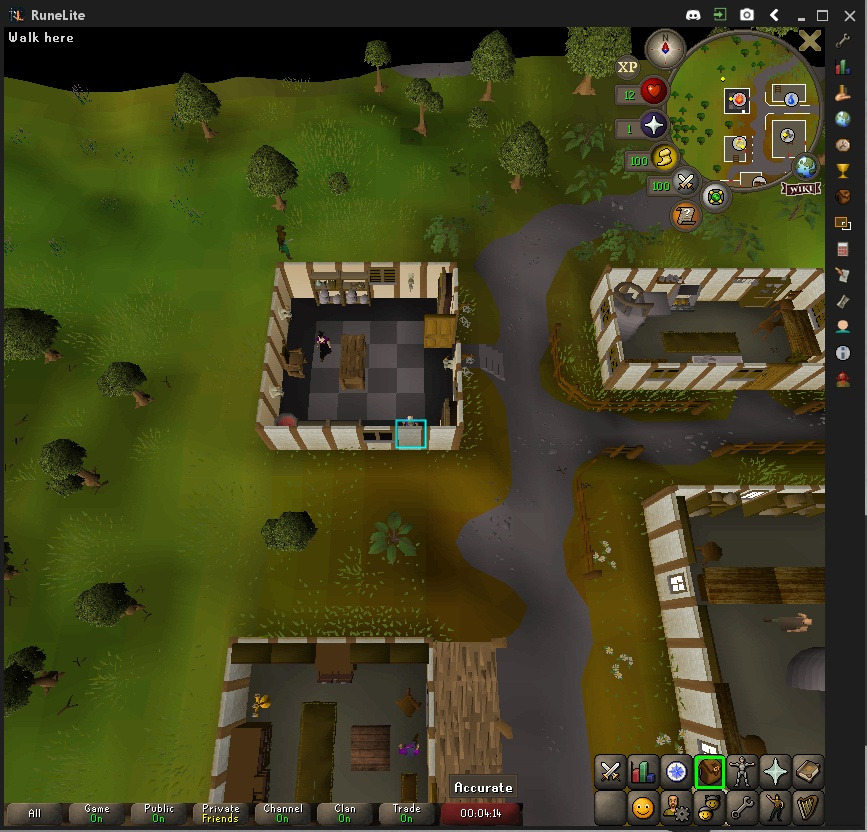
At this point, there are numerous paths you can explore further with OpenCV. I hope this tutorial has provided a solid foundation for you.
osrs botting Source Code for opencv template matching
Below is the entire code for reference:
import cv2

# Load the images
haystack_img = cv2.imread('path_to_haystack_image')
needle_img = cv2.imread('path_to_needle_image')

# Perform template matching
result = cv2.matchTemplate(haystack_img, needle_img, cv2.TM_CCOEFF_NORMED)

# Display the results
cv2.imshow('Result', result)
cv2.waitKey(0)
cv2.destroyAllWindows()

# Get best match location
min_val, max_val, min_loc, max_loc = cv2.minMaxLoc(result)

# Draw a rectangle around the matched region
threshold = 0.9  # Adjust this value based on your use case
if max_val >= threshold:
    needle_h, needle_w = needle_img.shape[:2]
    location = (max_loc[0] + needle_w, max_loc[1] + needle_h)
    cv2.rectangle(haystack_img, max_loc, location, (0, 255, 0), 2)

# Output the final result
cv2.imwrite('output_image.jpg', haystack_img)
One thought on “Osrs Botting: Beginner guide”