


Introduction: Welcome to Sly Automation! In this guide, we’ll walk you through the process of building Unethical Light in IntelliJ, a fork of OpenOSRS—a RuneScape client similar to Brew Light—with additional features. Whether you’re an avid gamer or a developer looking to explore custom plugins, this tutorial will help you get started. So let’s dive right in!
To follow along a video guide, watch the video below:
Step 1: Accessing the Repository
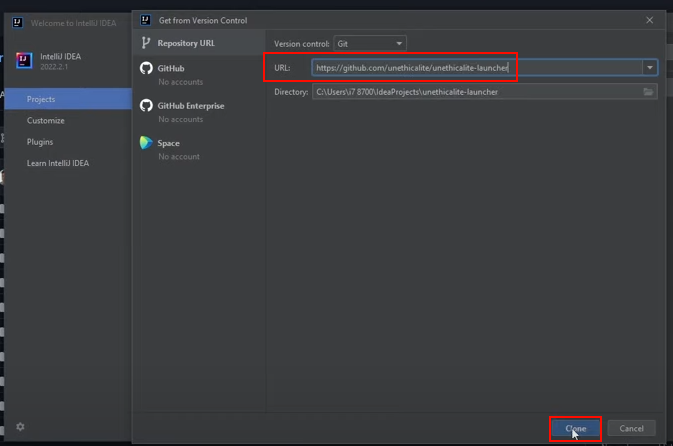
- Open your web browser and go to https://github.com/unethicalite/unethicalite-launcher
- Or in the search bar, type “unethicallite” and make sure to select “All GitHub” for a comprehensive search.
- Click on the “Users” tab and look for “unethicallite.”
- Once you find the repository, navigate to the launcher’s URL.
Step 2: Setting Up the Project in IntelliJ
- Launch IntelliJ and create a new project.
- Choose “Get from VCS” and paste the URL of the Unethical Light launcher repository.
- Click on “Clone” to download all the necessary project files.
- Wait for the project to finish building, which may take a few minutes.
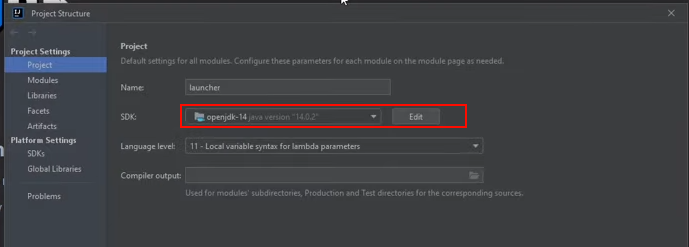
- Verify that the project is using the appropriate JDK version (e.g., OpenJDK 11 or 14).
- OpenJDK 11/14 can be downloaded from here: https://jdk.java.net/archive/
Step 3: Running the Project with Gradle
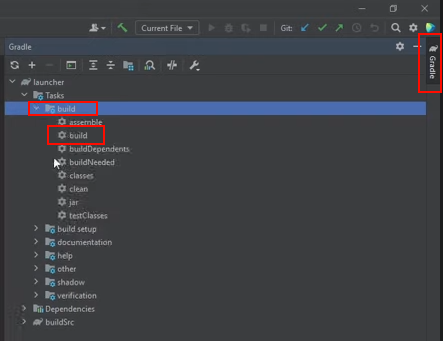
- In the IntelliJ toolbar, locate the elephant icon on the right-hand side.
- Click on “Tasks” and expand the “Build” section.
- Right-click on “Build” and select “Run.”
- This step ensures that there are no conflicting dependencies for the project.
- Additionally, you can check the project structure to confirm the JDK version (e.g., OpenJDK 11 or 14).
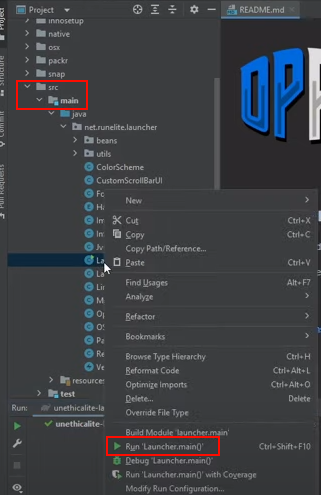
Step 4: Launching Unethical Light
- Open the “launcher” file in the source folder (src/main/java/net.runelite.launcher).
- Right-click on the Launcher file and select “Run.”
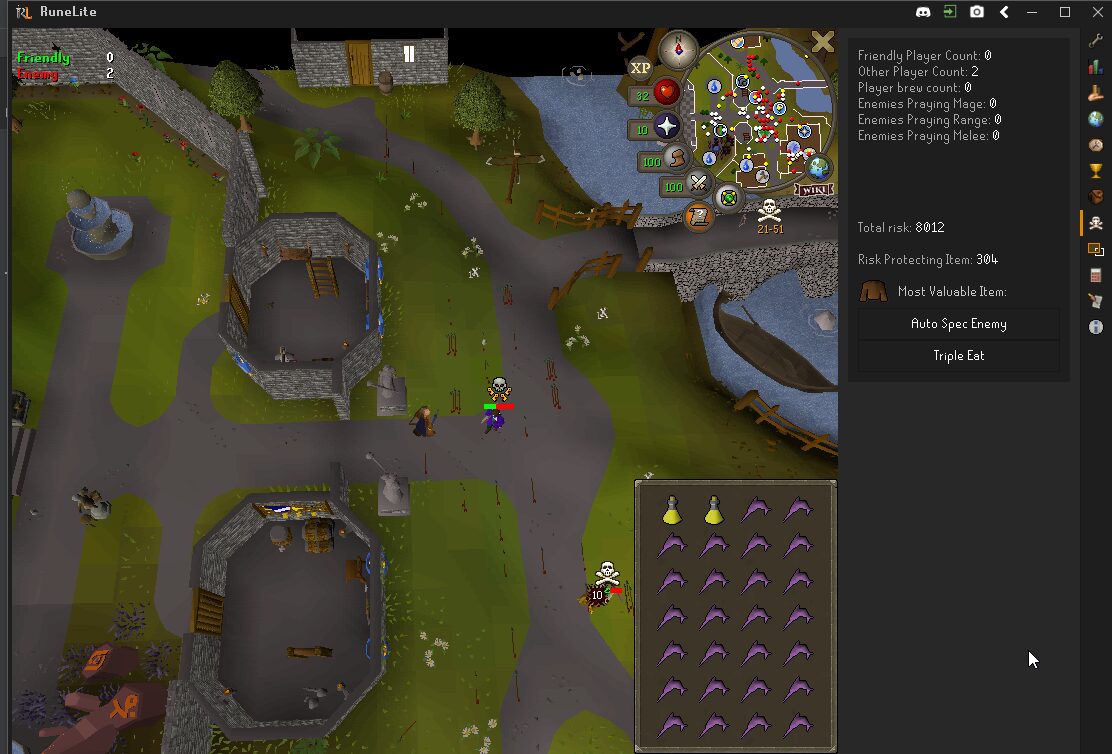
- This will launch the Unethical Light client, which may take a few seconds to load.
- Choose the “Stable” version for a reliable experience.
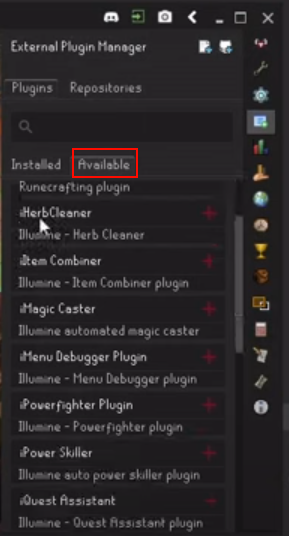
Step 5: Adding External or Custom Plugins
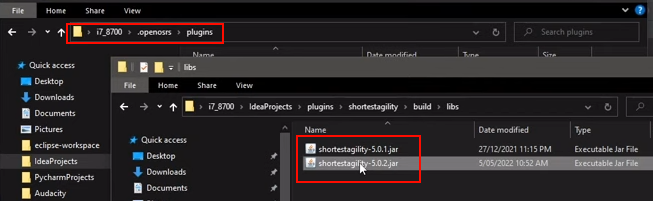
- Locate your user documents folder on your computer.
- Find the folder named “.openosrs” in the same directory.
- Within the “.openosrs” folder, locate the “plugins” folder.
- To add a custom plugin, copy the plugin’s jar file into the “plugins” folder.
- After adding the plugin, rerun the project to ensure it builds with the new addition.
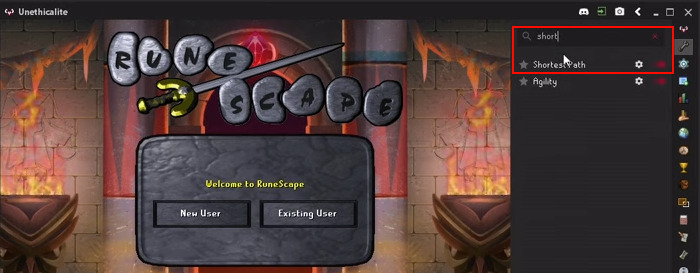
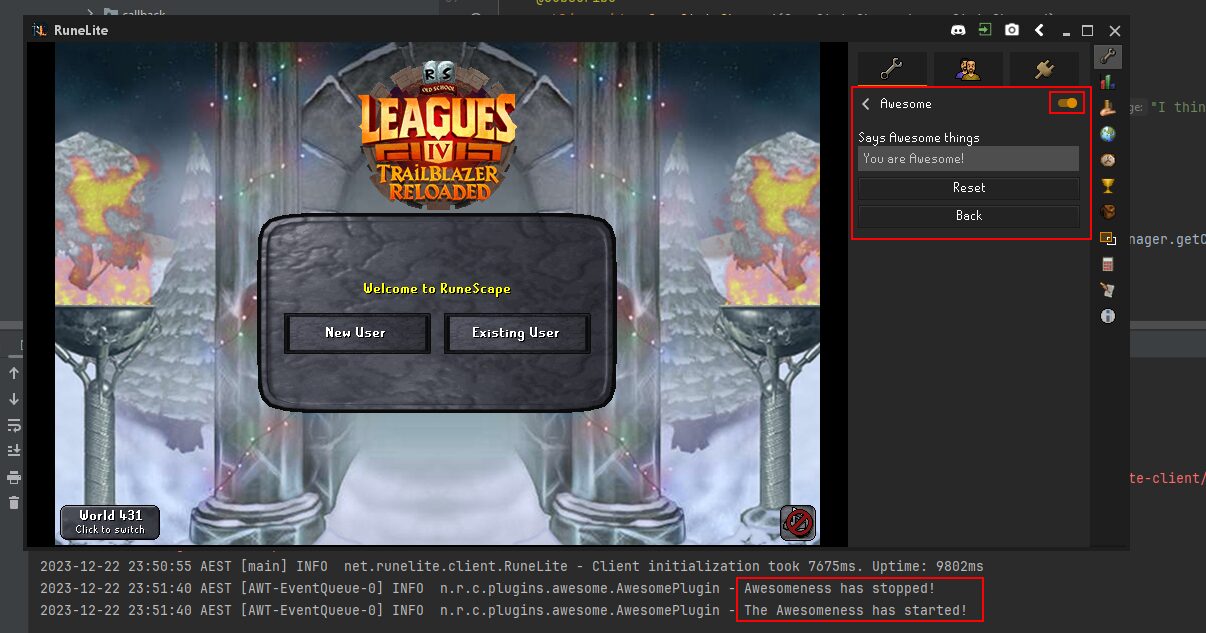
Step 6: Verifying Plugin Installation
- Once Unethical Light has loaded, go to the settings.
- Search for the plugin’s name or keywords related to it.
- If the plugin is correctly installed, it should appear in the settings.
- You can test this by searching for the plugin or its functionalities.
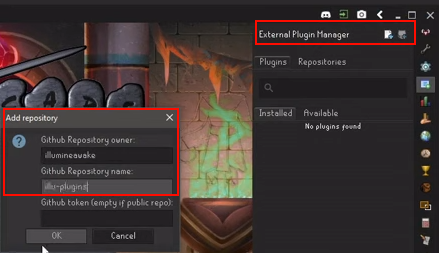
Step 7: Using the External Plugin Manager
- On the right-hand side of IntelliJ, locate the external plugin manager.
- Click on the GitHub icon in the top-right corner.
- Click “OK” to proceed.
- Enter the repository name and press “OK” again.
- You will see a list of available jar files from the repository.
- Select the desired plugin and click “Install.”
Conclusion: Congratulations! You’ve successfully built Unethical Light in IntelliJ and learned how to add custom plugins to enhance your RuneScape gaming experience. We hope this guide has been helpful to you. Stay tuned for more building tutorials, and don’t forget to like and subscribe for future updates. If you have any questions, feel free to leave a comment. Happy gaming!

It’s actually a great and helpful piece of info.
I am happy that you shared this useful info with us.
Please stay us up to date like this. Thank you for sharing.
Here is my homepage – nordvpn coupons inspiresensation (shorter.me)
Hello there! This is kind of off topic but I need some
advice from an established blog. Is it very hard to set up your own blog?
I’m not very techincal but I can figure things out pretty
fast. I’m thinking about making my own but I’m not sure where to begin.
Do you have any points or suggestions? Thank you
Here is my web blog nordvpn coupons inspiresensation
Hello Dear, are you really visiting this web site on a regular basis, if so afterward you will without doubt get nice know-how.
Here is my web site nordvpn coupons inspiresensation (http://t.co)
Great post. I was checking continuously this weblog and I am impressed!
Very helpful info specially the last part 🙂 I take care of such info much.
I was seeking this certain information for a very lengthy time.
Thank you and good luck.
Check out my web site nordvpn coupons inspiresensation
nordvpn coupons inspiresensation 350fairfax
Nice blog here! Also your site loads up very fast! What host are you using?
Can I get your affiliate link to your host? I wish my site loaded up
as quickly as yours lol
What’s up mates, how is all, and what you desire to say regarding this
post, in my view its truly amazing for me.
My web site: vpn